

How To Layer A Raised Garden Bed
Disclosure: this post may contain affiliate links, which means I may make a commission if you decide to make a purchase through one of my links, at no cost to you.
I hope those of you in the states had a happy, safe, and productive holiday weekend! I spent part of mine working on my garden beds:

The good news: all of the garden beds are now buried in their rightful spots in the dirt (sweet!). These three long garden beds were basically FREE thanks to some leftover materials I had from building this part of my fence (which was also basically free since my sister had these items left over from her fencing project, so it was win-win-win). I originally started with these plans, but modified them to be a little narrower and longer for each bed since I'm not planning on planting edibles in them (there's not enough sunlight on this side of the yard). Let me know if you want the exact plans & I'll include a post this week with them.


The bad news — er, well, the less fun news: I have a lot of layering to do. It means a lot of trips back and forth with the wheelbarrow, but thankfully I found this amazing Youtube video that has taught me how to pop my upper back by myself, which is such a help.

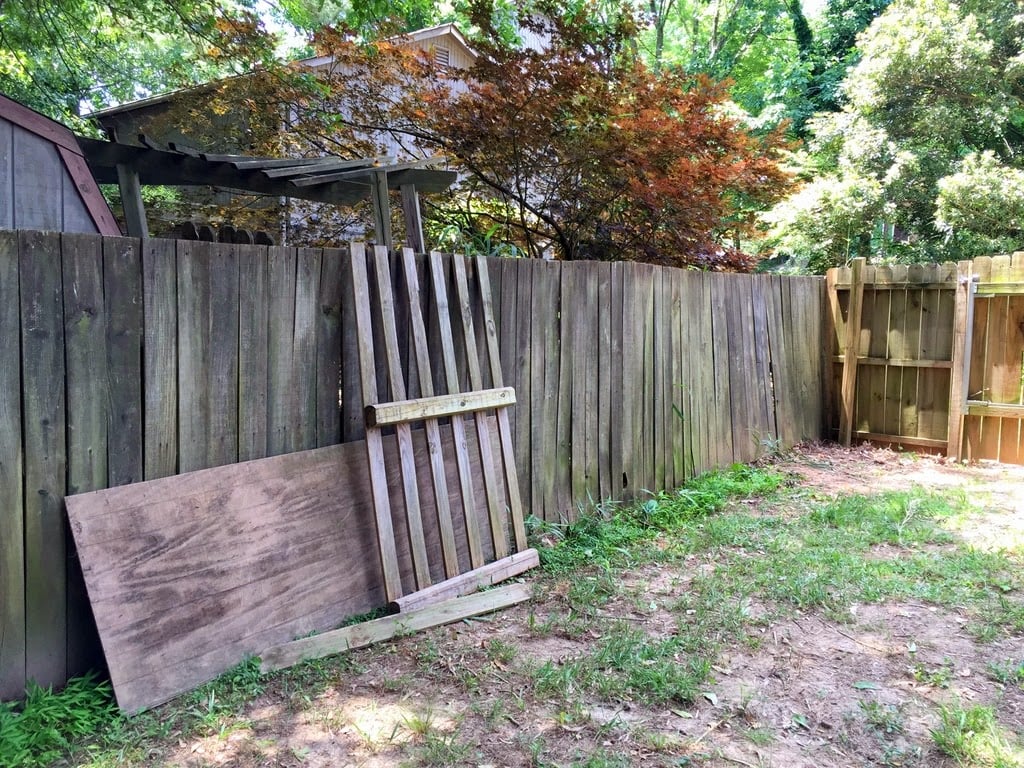
If you want to see what I started with, I took a few extra pictures before installing them. It's pretty clear from these pictures why I'm putting these in front of this neighboring fence (word to the wise: do NOT plant bamboo in your yard… it grows fast and destroys everything around it!). While I can't do much to repair it (I'd rather not incur the expense of repairing someone else's fence to this extent, and the bamboo on the other side will still cause problems), I can certainly dress up this side and hide it a little with some evergreen shrubs — and the raised beds prevent me from having to dig down into the hard Georgia dirt and remove roots.

Sidenote: isn't that Japanese maple in their yard gorgeous? I'm thinking of planting one along a back corner of my own yard (neighbors on both sides have them, actually).
I'm using a method that is sometimes called "lasagna gardening"; essentially, I'm putting in various layers of things like cardboard, mulch, yard clippings, and soil. A little gardening research told me that this will give my aforementioned black thumb a much better chance of keeping weeds at bay and the plants I actually spent money on alive (I think this is why I dislike gardening in general; it's gambling my money on something that might not live… like buying a $15 goldfish… and yeah, I know that most places have guarantees for plants, but who wants to dig up a dead plant, put it back in your car, find the damn receipt, and drive to the store you bought it from? Ok, rant over.).

But best of all, lasagna gardening reduces the overall cost of filling each bed with pricey bags of gardening soil and instead lets me use items that my yard has already provided in abundance… like cheap newspapers that get chucked onto my front lawn, pine straw, and mulch from tree removal earlier this year. Here's how I did it:
1. Cardboard
The base of each layered bed is a generous supply of cardboard. Just before I began building the beds, I gave away an entire recycling container worth of cut up cardboard, and then immediately kicked myself, thinking I would have to wait weeks to collect enough again to fill these three beds. And then I walked around my house for about ten minutes and realized that cardboard is about as abundant in a person's home as that clown car of plastic-bags-inside-another-plastic-bag BS we all fall victim to. So anyway, plenty of cardboard.

The cardboard (wet newspaper works too) acts as a weed blocker, kills the grass below, and also helps prevent any roots from working their way up. While these pictures look a bit disheveled, you'll want to fully cover any exposed grassy parts before adding the next layer (so fill in gaps with newspaper if the cardboard isn't malleable enough to fit).
2. Mulch
For more weed-blocking power and to establish the soil in a well-drained setup, I wound up doing two layers of mulch: first with pine straw (because, well, there's a shitload of that still around)…

And then with the mulch from grinding down the stumps of the pine trees removed earlier this year (because, well, with 5 trees removed, there's a shitload of that too). Bonus was that since these mulch piles have just been sitting around in the heat and rain all spring, they've already begun to compost, which should be really nice for the beds! And people say laziness gets you nowhere. Pssh.

Some tutorials suggest adding "green" layers too, such as grass clippings or other yard debris. I haven't added any of that to the pile, but if you have it, use it.
3. Soil
I haven't really gotten to this step yet, because it turns out that it takes a lot of wheelbarrows of pine mulch to fill in these beds, but I'm planning on combining a few bags of compost and possibly peat moss to top things off.

There's more filling in to do this week, but I've already accumulated a total of 6 plants to fill in the first two beds (I would have gotten more, but it was all the store had of what I wanted). But it also means I can only wait so long to put them in the ground, so this will be a good way to push me to get things done!

I'll have some final shots ready once planting and mulching is all complete, but I'm glad to be feeling like I took a GIANT step forward in making this side of my yard look a bit more organized and well-maintained. It's redistributing the large mounds of pine mulch too. And did I mention mostly FREE? Gotta love that.
UPDATE: The gardenia garden beds are done! See this post for what they look like now!


Hey there! I'm Sarah. My favorite things: 1) tearing my house apart and 2) putting it back together again. I occasionally talk about other things, like life and food and travel, but it's mostly my obsession with DIY and power tools that you'll find here!
Got a DIY question? Tag me on Instagram @uglyducklingDIY or use the hashtag #uglyducklinghouse to show off your projects!
How To Layer A Raised Garden Bed
Source: https://www.uglyducklinghouse.com/lasagna-gardening-layering-a-raised-garden-bed/
Posted by: masonhimought.blogspot.com
0 Response to "How To Layer A Raised Garden Bed"
Post a Comment