

How To Sew Eyes On Crochet Animals
Long awaited Amigurumi Eyes Embroidering Tutorial is finally here!
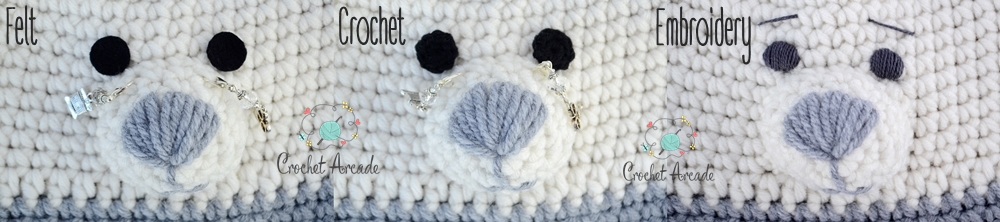
When creating my Encompass and Play Teddy Carry AmiBlanket (the blanket that turns into Amigurumi) I wanted to offering the option of 3 dissimilar types of eyes that are safety for children. The first were felt eyes, the second were crocheted eyes and the terminal (but not to the lowest degree) were Embroidery optics which are the safest option of all. I thought I'll share the tutorial with all of you lot on here as like they say: 'Sharing is caring'!
Embroidering the eyes is not an like shooting fish in a barrel task! Information technology requires a practiced attending to details and some patience too simply don't worry, I came up with some special techniques to assist you embroider the Almost Perfect optics.
Below you can find both Eyes Embroidering photograph tutorial with written description as well as the 'How to Embroider Amigurumi Eyes on Crochet video tutorial'.
AMIGURUMI Eyes EMBROIDERING TUTORIAL –
HOW TO EMBROIDER Virtually PERFECT AMIGURUMI Optics
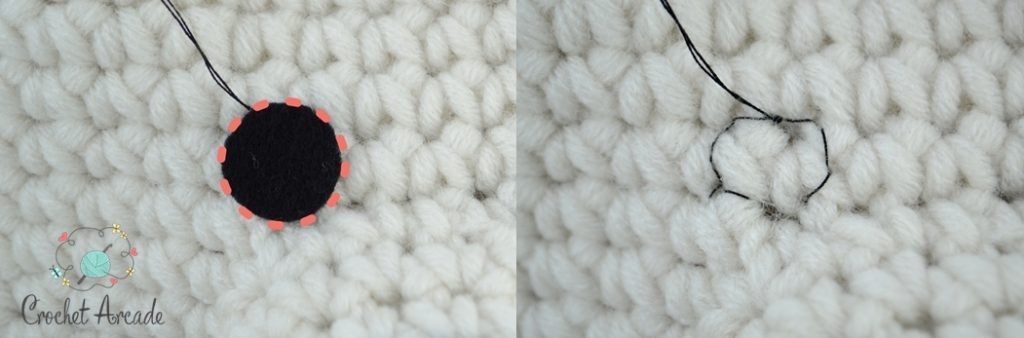
Step one. Decide what size of the eyes you want or brand the i suggested by the blueprint. If you don't know what size would await good. Cutting out diverse size, round circles (in pairs) from nighttime colour paper or a piece of felt material as a 'pretended eyes' and place them on your amigurumi to see how y'all feel nearly them. Cut out around the object in a continuous line equally indicated past the dotted line on the photograph below.

Footstep 2. Once you chosen the optics size, think of the eyes placement. Try putting them closer and further apart and meet what face expression each position gives you and decide which i you similar the best. If you don't know what looks best effort looking for an inspiration on the internet. Blazon in to google whatsoever you are making like: 'teddy bear', 'fox toy', 'elephant costly toy' etc. Switch to view images and see what is the standard placement of the eyes for the grapheme you are making.

Pace 3. When you take your eyes in your chosen position, pivot them in place or brand one stitch in the centre to hold the eye in place. From now yous have 3 choices of templates to assist you embroider almost perfectly round eyes.
Template A) Using needle and black thread make few stitches around the edge of the paper/felt eyes to give you lot a guide for embroidering the eyes later. Unpin the dummy centre and examine the shape. If it's not quite round (like mine on the picture below 🙂 ) or turned out a bit too small. Brand another circle just above it using the sometime circle as a guide (it'south easier to sew without the pretended eye in place). If it's even so not perfect, don't worry, yous tin can just right the shape one time you lot are embroidering the eye. If y'all don't experience confident about correcting the shape while yous sew then attempt methods B or C described below.
Template B) or use blush powder or low-cal eye shadow (something that can be washed off if you are not happy with concluding eye positioning) to fill the whole centre area for the guidance. Accept the template off and you have a perfect circular shape to embroider over.

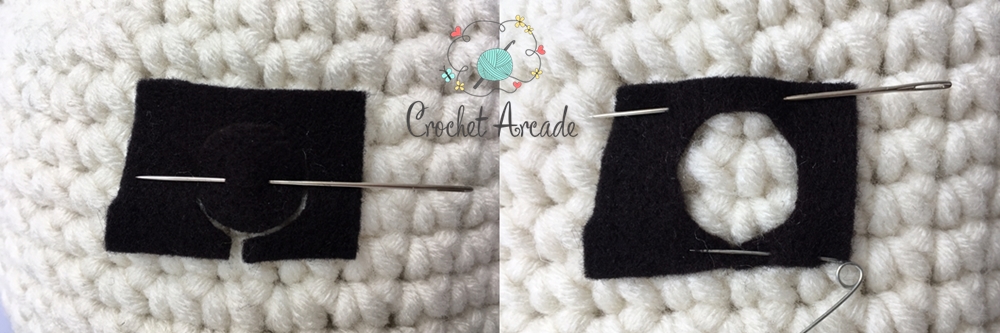
Template C) In this method you volition need a piece of paper or a felt out of each you've cut out your dummy optics, this will now be your template. Identify the piece over the center and take the middle off. Pin the template in place and embroider within it.
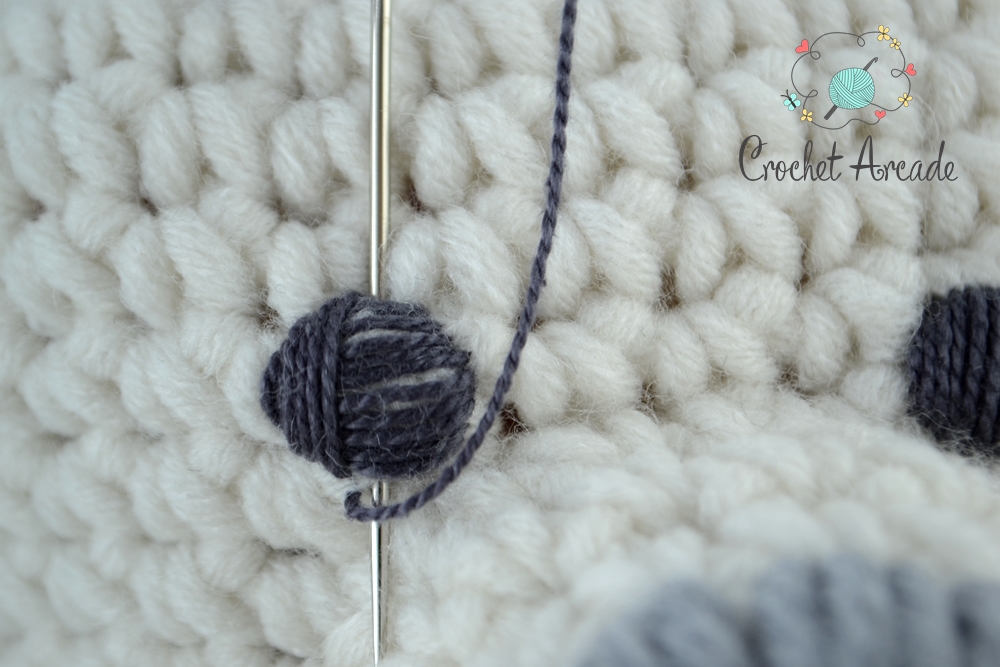
Step 4. Using large eye needle and embroidery thread kickoff making horizontal overcast stitches starting at the bottom and going up. Utilize the guide made in footstep 3 and embroider going slightly over the circle guide in method A and C to hide the stitching or shaded area inside.

Step 5. Now this is a final stride of the embroidery. If you are happy with how the eye looks you can finish at step 4. If you desire the optics to have a more 3D upshot or if there are any imperfections in the eye, like too short stitches or gaps between the stitches, and then at present it's the opportunity to correct it. Start making vertical stitches over the horizontal stitches y'all already have trying to correct the shape. Make the stitches one side by side to another to cover any gaps betwixt the stitches from the Step 4.


I hope this tutorial volition helped you lot to embroider the almost perfect eyes on your Amigurumi.
If you would like to say thank you , please SHARE this postal service on your Facebook using buttons beneath the mail service or Pin information technology using the photo below to your Pinterest board (just hoover over the photograph for 'pin it' push button to show. Thank you <iii

![]()
Source: https://www.crochetarcade.co.uk/how-to-embroider-perfect-amigurumi-eyes/
Posted by: masonhimought.blogspot.com
0 Response to "How To Sew Eyes On Crochet Animals"
Post a Comment